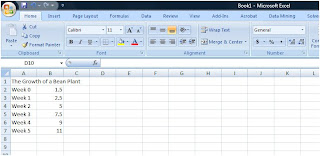
Here is a picture of our spreadsheet that we created using Excel.
Week 0 - At the start of the project, the bean plant was a small seed that was only about 1.5 inches long. It was a cream color and had a soft texture. We placed the seed in a bag and placed a little water in the bag after putting the bag by the window.
Week 1 - The seed has begun to slowly sprout. It is not 2.5 inches long; it has grown a whole inch since last week. Green leaf-like stems have begun to come out of the seed. We continue to water the bean daily and keep it under the sun.
Week 2 - The seed is really starting to grow into a plant, and it is now 5 inches long. It has doubled in size since last week. Leafs and stems are now sprouting.
Week 3 - The seed is now 7.5 inches long. It seems that the bean plant grows about 2.5 inches long after the trend from the past 2 weeks. The seed is barely visible now. It is starting to form more into a plant.
Week 4 - It now appears to be a plant. The plant is 9 inches long, again following the trend of growing 2.5 inches this week. It kind of looks like ivy, it has a stem with leaves coming from it. The plant is also getting too big for the bag and needs more water now.
Week 5 - We are done watering the plant. It has grown to a total of 11 inches long. The growth is no longer following the trend of growing 2.5 inches every week since it only grew 2 more inches this week. It looks much the same as last week. We do not think it will grow much more if we were to keep watering it and keep it in the sun.


